Setup a Dijets Node
Starting & Connecting a Dijets Node
The Scope of this 'How to' is to outline the steps required to build & start a Dijets Node that automatically connects to Dijets Network by default.
Dijets is a heterogenous network protocol running multiple blockchains built to serve their individual purposes. For the network to propagate globally, a minimalistic yet fully functioning executable binary file is required that does as follows:
Downloads, builds and executes Dijets Node configuration to connect to all three of Dijets Blockchains by default.
Bootstraps and syncs all of Dijets blocks and vertices to then start broadcasting all subsequent events & transactions.
Authorises a council member to register his/her credentials as the node operator thus fulfilling one of the membership requirements.
Demonstrate the lightweight implementation and functional capabilities of Dijets boiler plate code and the ease with which node operators can not only build and run nodes with custom configurations but also deploy a Child-Chain as a their own individual private or consortia blockchain network.
Please refer to the Enterprise Chains section of the reference guide for details on how to deploy a private network on Dijets.
Installation
Requirements
Unlike most of the other blockchains, Dijets is an extremely compact and light protocol. This enables developers to run the Dijets Node with the most minimal hardware requirements. Typical requirements for running a Dijets Node are:
- RAM:
12 GB - Storage:
500 GB (In determination of network growth) - Operating System:
Ubuntu 20.04 or MAC OS (Upwards of 10.15 Catalina) - Network:
Reliable IPv4 or IPv6. (Ideally a static IP)
This tutorial requires an Ubuntu 20.04 system configured with a non-root user with sudo privileges
Instructions
Press Command ⌘ and Spacebar to bring up the Spotlight. Then type in the word “Terminal” (without the
quotation marks).
Select Terminal from the list and wait for the session to start.
Connect to your Ubuntu server via ssh:
ssh penxen@your_server_ip
Replace penxen with your username and your_server_ip with your server's IP address.
Wait for your session to connect to the remote virtual machine host.
Install Golang
In order to build Dijets Node Binary files, you need to have Golang installed on your system.
Skip this step if you already have Golang installed
Navigate to the official Go downloads page in your web browser. From there, copy the URL for the current binary release’s tarball.
As of this writing, the latest release is go1.19.4. To install Go on an Ubuntu server (or any Linux server, for that matter), copy the URL of the file ending with linux-amd64.tar.gz
Now that you have your link ready, first confirm that you’re in the home directory:
cd ~
Use the curl command to retrieve the tarball, making sure to replace the highlighted URL with the one you just copied. The -o flag ensures that this outputs to a file, and the L flag instructs HTTPS redirects, since this link was taken from the Go website and will redirect here before the file downloads:
curl -OL https://golang.org/dl/go1.19.4.linux-amd64.tar.gz
Its good practice to verify the integrity of the files you download onto your server. Run the sha256sum command and pass it to the filename as an argument:
sha256sum go1.19.4.linux-amd64.tar.gz
This will return the tarball’s SHA256 checksum:
Output
go1.19.4.linux-amd64.tar.gz
7fe7a73f55ba3e2285da36f8b085e5c0159e9564ef5f63ee0ed6b818ade8ef04  go1.19.4.linux-amd64.tar.gz
If you followed the steps correctly thus far, then the checksum should matche the one listed on the official Go downloads page.
Use tar to extract the tarball.
sudo tar -C /usr/local -xvf go1.19.4.linux-amd64.tar.gz
Set paths in your environment to successfully run Go commands. To do so run:
sudo nano ~/.profile
Then, add the following information to the end of your file:
. . .
export PATH=$PATH:/usr/local/go/bin
Refresh your profile by running the following command:
source ~/.profile
You should now be able to execute Go commands needed to build a Dijets Node Binary. To double check that you have succesfully installed Go on the server, run:
go version
This command will output the release number of whatever version of Go is installed on your system:
Example Output: go version go1.16.7 linux/amd64
Build Dijets Node Binary
Start by cloning the Dijets network project files from GitHub into a local folder.
git clone https://github.com/Dijets-Inc/dijetsnodego
This should put a folder in your current path with a name of dijetsnodego
Step inside the folder by typing:
cd dijetsnodego
You can now start the build process for Dijets Node. Start by typing:
./scripts/build.sh
You will see the output showing the dependencies being downloaded. Soon after you should see the confirmation with the following output text:
Building Dijets Node Binaries...
Building Dijeth@(version) ...
Build Succesfull
You can confirm that the binary file was built successfully by checking if there is a build folder in the project with the file dijetsnodego present.
If dijetsnodego file is present in the build folder, you can go ahead and start the Dijets
Node by running:
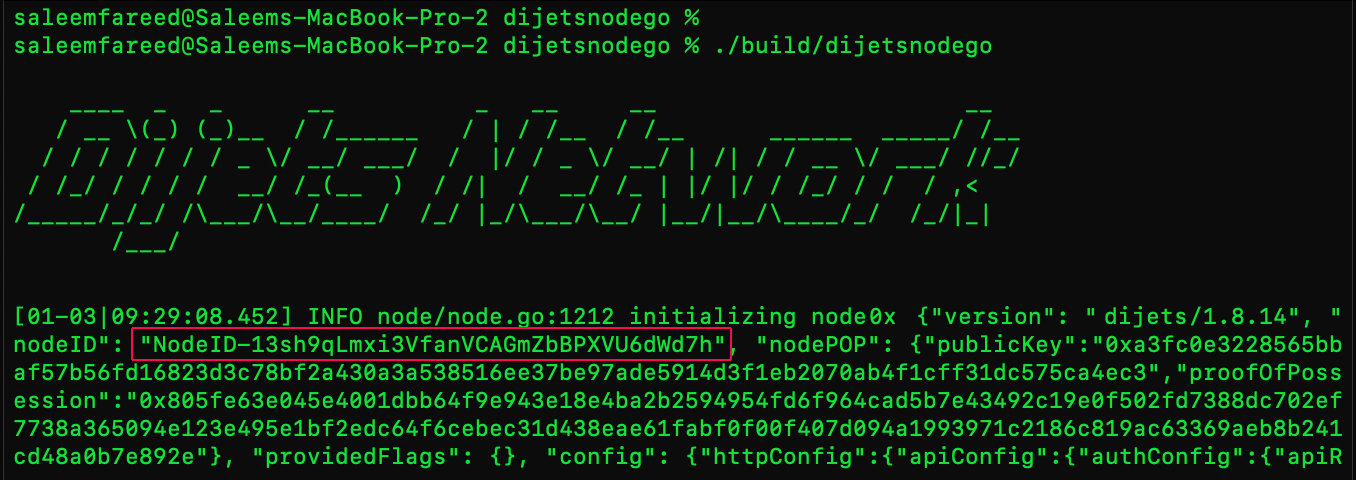
./build/dijetsnodego
Running the command above starts your node and automatically attempts to connect your node to Dijets Mainnet and its ternary chain ledgers. The command also starts the bootstrapping process for the network lets your node catch up to the latest Dijets Network Block.
How to find the Node ID
The video below assumes that you already have Go installed on your system.
Outputs
To submit a Validator's transaction to Dijets Network, Council Member's must first note down the Node ID of their node. This Node ID is automatically generated by the network after ./build/dijetsnodego command.